Voyager Newbie Questions re: start up routine, ASPS and Flats

I have just made a switch from SGPro to Voyager.
So far I am liking it a lot. I managed to do most of the tasks and had a sequence run last night.
The focusing was fantastic and the handling of guide star loss was also very good.
For the first time I did not have to intervene at all while the sequence was running.
So overall I am very happy. However, I have encountered a few problems / questions:

Session start up routines

I have to set up and take down each night: When I first set up, I will run AP Jog (for AP Mach1 mount control) and SharpCap Pro to do a polar alignment using a mini guide scope. The mini Guidescope and the camera attached to it are both there only for this purpose. After polar alignment I will quit SharpCap Pro and I do not use the mini Guidescope and its camera any more (sometime I will remove them completely).

I will then start Voyager. At this point, if I have not been using a particular scope for a while, I will need to do the following:

(a) Rough focus
(b) Plate solve to get the precise orientation of the camera and synchronise mount to a known position
© Slew to a focus star
(d) Achieve a better focus

With my old software, I will put the camera on bin 4x4 and then take multiple 1s exposures in a loop, while manually adjusting focus until the stars are roughly in focus. Then I will slew to a place with many stars e.g. near Dec 0 due North (as I am in Southern hemisphere). Then I will take an image and do a blind plate solve and sync, so that the mount will know where it is pointing, the software will know what orientation the camera is and the exact pixel scale of the setup. Then I will slew to a nearby star to get a better focus. After that I can then get on with any sequence as normal. I typically do these setup routines while the CCD is cooling.

Now with Voyager I am not sure how I can duplicate these routines. In particular, I know how to capture one image at a time but it does not seem to be a good way to get rough focus. Also I wonder if the above steps can be automated somewhat with Dragscript?

ASPS

ASPS and Platesolve2 both seem to struggle with blind solving the initial image in the above routine (when focus is only rough, orientation is unknown, and pixel scale may not be accurate). I have made sure that the correct indices are downloaded. At the end, I have to resort to using Astrometry.net web. My question is, does Voyager pass any focal length info, orientation and pixel scale to ASPS when doing a blind solve? When I select blind solve, it usually means that I do not know the orientation. I am wondering if that’s the reason why blind solves fail here.

ASPS also seem to hang / become unresponsive so I have been using Platesolve2 for subsequent solves (which works fine).

Flat

In my last test sequence, I captured all the light frames (LRGB), slewed to zenith manually (so that I could place the manual light panel on the scope without it falling off) and then run the auto-flat sequence. The auto flat sequence seemed to work well, except that the after having gone through L, R G and B for the light frames and returning to L for the flat frames, the dust motes and reflections in the light frames and flat frames did not match any more. As a result I ended up with a Lum master with uncorrected light reflections / dust motes…like this :unamused::

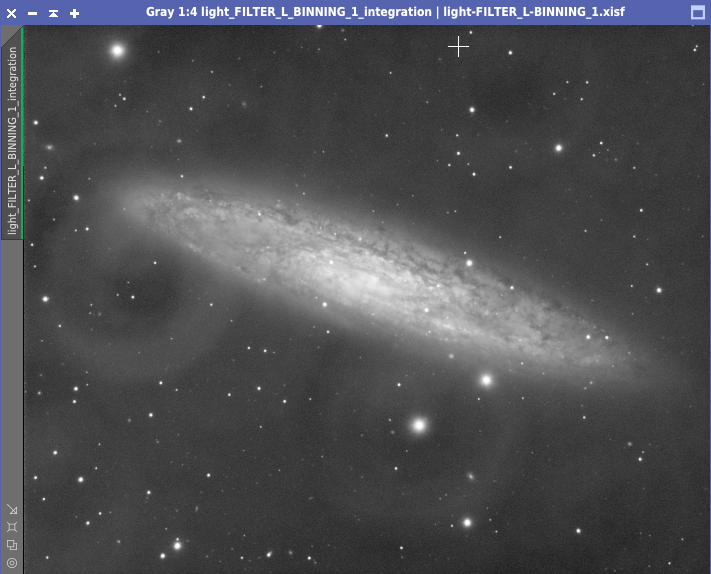
I am wondering if one can program Voyager to take light frames for one filter, then slew to zenith, pause so I can put on the panel (but I can’t figure out how to program for one), take flats, pause (so I can take the panel off), slew back to target and the start taking light frames again for a different filter.

Thanks for any tips

Henry

Welcome Henry,

I will try to answer your questions by making two small premises:

  • the first is that Voyager is not SGP so it is natural you can find differences, indeed there must be. Voyager is an integration and automation system aimed at unsupervised astrophotography
  • the second is that some of the things I’m going to tell you are also tips from an experienced astrophotographer and not just from the Voyager developer, so take what’s said with the right philosophy

For your requests:

  • I also have a mach1 which, like you, I mount every night, there is no need to do the assisted polar alignment, just use the polar scope or the RAPAS , this alignment make half-hour guided possible at high resolution. You can remove the alignment part unless you have a chance to see the polar (or if for your emisphere something similar). The pole alignment operation during 1 minute.

  • if you setting up every time it is useless to always redo the initial focus, use a caliber and take some references so as to start from an already suitable base when you setting up, then Voyager is able to make focus even if you are not in focus with the RoboFire in RoboStar mode. The same goes for solving, all the solving application still allow a minimum of out of focus

  • never do a plate solve at the beginning of a session unless you have an observatory and exit from the parking. It is necessary to perform a Blind Solve and synchronize, from there on you can use the plate solve

  • once you are aligned you can make focus with a button with Voyager, he chooses for you and also points at the most appropriate star. If you really don’t want to start shooting directly

Now I tell you how I do my AP : from the mount pointing the polar star i open the clutches and point at random to the east, I close the clutches. I perform a blindsolve from the onthefly section with the “BlindSolve Actual Coord” button and then I press the “Sync” button higher up in the “Solved Coordinates J2000” box. From here on I usually start my dragscript and go to sleep. If you want to focus you can press the “Autofocus with Voyager AcquireStar” button again in OntheFly and Voyager will take care of pointing a suitable star and making the focus.

If you need to rotate the camera (I sincerely suggest you leave it orthogonal to the axes and at the limit rotate it by 90 ° because you must have a very good rotation system) you can use the “Plate Solve Actual Coord” button in OntheFly and read the value of PA solved, rotate the camera and try again until you have reached your goal. Remember that if you rotate the camera the flat should be done with that rotation to avoid light donuts in the light.

ASPS is Italian, the undersigned and the owner of that software have personally developed togheter the integration first and I must tell you that it has been working very well for almost 8 years. The only thing you have to be careful of is having a very precise focal length and the pixels size set in Voyager otherwise ASPS fails or takes so long. In a plate solving system the orientation is not indicated as it is not needed. Check that you have the correct scale for the unit and remember that it is still a free system with some limitation. Stop using Blind solving once it synchonized and use the plate.

If you want to do the zenith flat Voyager has a button that helps you point the zenith, it’s called “Goto Near Zenith” you find it in onthefly box utilities. From there on, use AutoFlat. From the image attached the problems are so big that I think you did something wrong. Remember to do the flat with the same rotation of shooting and to the right ADU. You don’t have to do the flat between one filter and another, you have to do them all together at the end. I personally do them at the beginning of the evening while I wait for the complete darkness, or I let them do it through the SkyFlat of Voyager at dawn.

Thanks again for using Voyager, if you need support please refer to dedicate mail and ask remote support. We can do first light togheter.

All the best
LO

1 Like

Thank you Leonardo

(1) With respect to polar alignment, SharpCap Pro is a must really because I am in Southern Hemisphere. Even after polar alignment I still struggle to find sig oct in the polar scope, so getting a RAPAS is not really going to help. But the polar alignment comes before I start Voyager, so Voyager is not required for this part of the setup. I just mention it for completion.

(2) Using caliber to set rough focus point is a good idea. I am actually using this method for my refractor setup as I can mark on the draw tube. The problem I have is with my EdgeHD SCT as it does not have a draw tube. If I do not change the imaging chain, the focus is usually pretty close from the last time I used it, however if I take off or put on the reducer, a rough focus is necessary. Most of the time though it is not a problem.

(3) However, the orientation of the camera is different each time I attach the imaging chain to the OTA. This is not by choice. It is just that the way the imaging chain is attached to the OTA means that the camera angle is different time I attach and detach the imaging chain. I try to keep it as close to 0 degree as possible but sometime it is just not possible. So I always need to plate solve at the beginning to make sure the software knows how the camera is oriented.

(4) Will listen to your advice and do a blind solve. When I go from one Voyager profile to another, do I need to manually go to ASPS and change the pixel scale to match, or does Voyager sent it to ASPS automatically? Can I specify different focal lengths / pixel scale automatically to ASPS via Voyager depending on the profile loaded in Voyager?

(5) When PHD2 is launched via Voyager, which equipment profile does it load? When I go from one Voyager profile to another, do I need to manually go to PHD2 and change the equipment profile to match, or does Voyager set the PHD2 equipment profile automatically? Can I specify different PHD2 profile to be loaded to match the profile loaded in Voyager?

(6) With the flat frame problem, this is again a problem with the SCT EdgeHD only. I found from experience that the orientation of the OTA etc for taking flats needs to be very similar to the orientation while taking the light frames, due to mirror flops etc. Therefore the best flat is taken usually with the light for each channel before moving on to the next channel. For example, with the bad example I have posted last night, I can get rid of all but one of the donuts when I retake the flats after simulating the orientation of the OTA while it was taking the light frames. I do not usually have this problem with my refractors, so it is a problem peculiar to my EdgeHD. I guess as a work around I will just have to do only one channel per light.

Hello Henry,

(1) sorry to read … i always think rapas and polar scope can help also in south
(2) you can use the test shot button to get a binned image and the fit viewer , with a simple dragscript you can shot and repeat if you want … when you reached an HFD around 20 or better you can go with a RoboFire focus on star. Usually if you dont touch anything like the reducer nothing of this is needed just a normal focus at sequence start
(3) When i have SCT and on my RC i have a reference point painted in telescope side and thread side to put the camera aligned to last position. this give you a resolution on error of 3° that is in tollerance for imaging. Anyay you can use the way i wrote above
(4) Voyager talk with ASPS , you dont need to anything on ASPS side, just download the right index
(5) Voyager doesn’t change PHD2 profile
(6) In my experience the image you send have another kind of problem or you have a big flop problem not in standard measure. But anyway you can decide to create a sequence for each filter and manage a goto zenith and flat and go back using dragscript, its possible.

All the best
LO

I was looking at the frame and focus side of things, which is one part Voyager automates less than some other software.

Regardless of how you deal with the initial manual focus or fine pointing to frame your target (Manually moving the mount via the associated ASCOM driver, a hand controller etc) I found it really quick and easy to create a dragscript to generate looping exposures for frame and focus. It was as simple as

  • Start
  • Expose 5 seconds (And with the exposure control set not to create unique file names so you will only have the last shot saved)
  • Delay (If you want one)
  • goto start
  • end

Just let that dragscript run while you manually tweak initial focus and framing and abort it when you are done, then you could plate solve the last image to pick out center coordinates for your preferred framing to put in the image sequence file.

2 Likes

Thanks Blue. We are working on framing using Aladin also if Voyager scope is automation, we think there are a lot of free tools that obtain better result than what we can do and dont want to reinvent the wheel. We are working also in RoboClip, a new feature to store the target name and coords in an non volatile easy way. RoboClip will be usable from all Voyager modules and you can recall data of target and use with a single click after added.

LO

1 Like

I am thinking in terms of a friend of mine we are working on to move to Voyager as his current image capture workflow is very manual. He routinely frames targets up on the fly with looping exposures and manually driving the mount rather than being able to pull out coordinates and just enter them.

I initially thought that the lack of looping exposures would be an issue for his framing preferences, but a simple dragscript produces exactly the same result as a looping exposure button. Once he is happy with his framing then it is simple to just plate solve the last exposure to yield coordinates to put in the sequence and for the first time he would be able to go back to a target night after night without lots of time lost re-centering.

Not being to have loop exposure is not a big deal. As LO says most of the time the focus is close enough from the previous use that this is not required. In the occasional case when this is needed I can always do it in SharpCap Pro, which I need to open for Polar alignment any way.

What I am hoping though is that Voyager can tell PHD2 to load the correct equipment profile depending on what profile is loaded in Voyager. At the moment when I switch Voyager profile I need to manually switch the PHD2 profile to match. It is an extra step but it is a nuisance especially if one forget to do that before clicking connect equipments in Voyager. If the guiding system is different (I have two) Voyager will fail to load PHD2.

This would be great, to be able to pass profile info to both PHD2 and TSX. I’ve been told though that TSX doesn’t provide a programmatic interface for this. As an aid, maybe adding a notes field in the Voyager profile to record which profiles to use in PHD2 and TSX?

In my case I had almost the exact same issue and it turned out to be that my ZWO filter wheel was not accurate in returning to the same filter position from opposite directions (it could probably be considered a type of filter backlash). After enabling the unidirectional option in the ASCOM driver the problem went away.

Welcome and thanks for tip.

All the best
LO