With the new Virtual FoV feature in the Web Dashboard, my nightly planning flow has been streamlined. Once Voyager Advanced ships, it will be even more so 
I use SkyTools 4 for target selection. It’s a rich product, so this is only a glimpse at it, but one of the features it has is a “scheduler” that shows visibility and estimated imaging quality for that target.
The dashed red line is the object’s elevation, and the red dashes turn into dimmed red dashes when the target sets behind my trees because my local horizon is defined in ST4.
So this object, SH2-135, is visible from sunset through about 11PM.

Now with Voyager’s web dashboard, I search for SH2-135 (I only have to do this step for the very first time I’m imaging this target) and drag and drop to frame it the way I want:

When I like the framing, I click RoboClip, which lets me enter the target into Voyager’s database by clicking Save:

Now my target is available in Voyager anywhere I need target coordinates.
I have streamlined things in Voyager further by creating a few sequence templates that I don’t need to change. E.g., one for LRGB, one for SHO. They both just shoot an hour through each filter and repeat. There are enough repeats to cover the longest night. The only settings that change between targets are target name, RA, DEC and PA. I override these from DragScript as follows.
My “unattended all night imaging” DragScript is set up to run from one to seven sequences (arbitrary choice on my part). Lately I’m usually running two or three max.
In the DragScript editor, I double click the “Run Sequence” step and click the RoboClip button. Pick SH2-135 from the list:
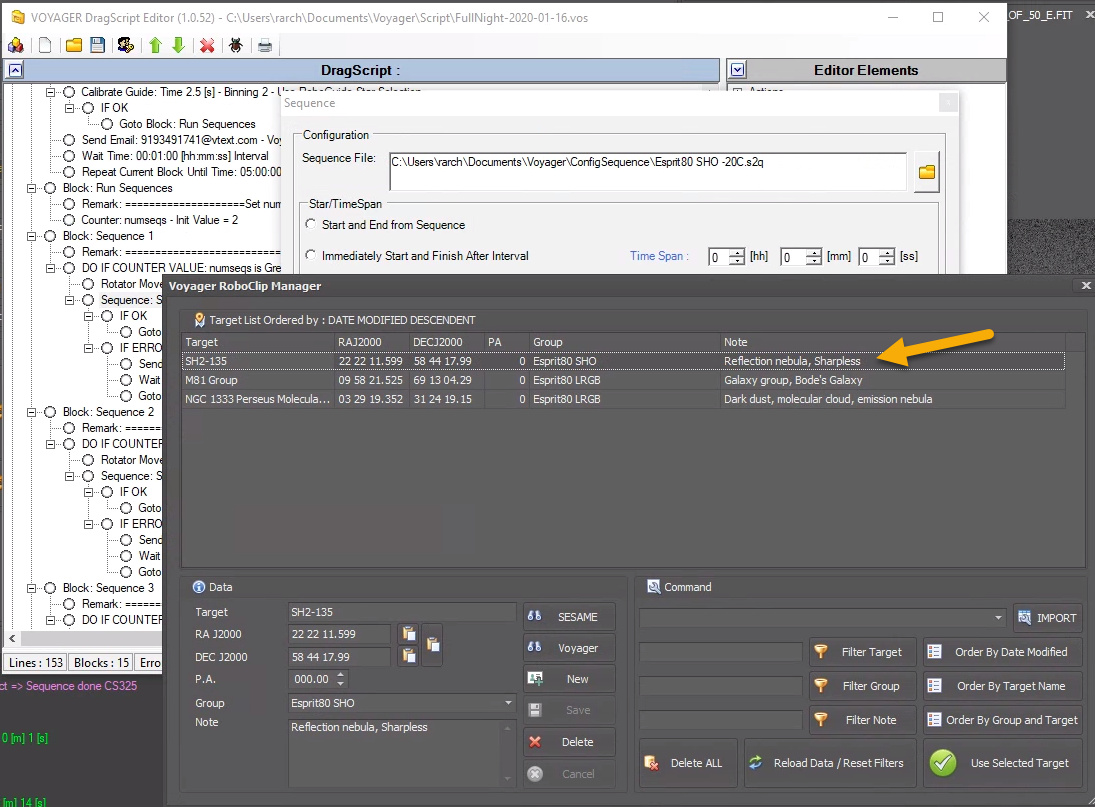
I use my template sequence file for SHO, and the values for Target Name and RA/DEC/position angle are populated from the RoboClip database.
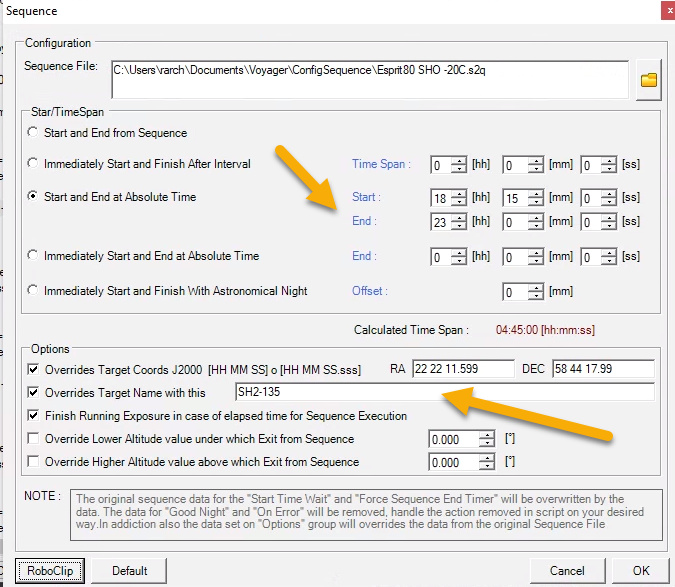
I set the start and end times based on what I saw in ST4 (sunset to 11PM):
Repeat for any additional targets.
Save the DragScript, load into Voyager and run it. Done.
Life is good
Rowland


